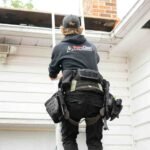
If you’re a carpenter heading into your very first fall protection class, let me tell you something upfront: you’re doing the right thing. Not because OSHA says so (even though they do), but because working at heights is one of those things where confidence can fool you and gravity never misses.
I’ve seen brand-new apprentices walk into class nervous… and I’ve watched 20-year veterans walk in grumbling because they think they know it all. And funny enough, half the time it’s the veterans who get corrected the most.
So let me walk you through what really happens during your first fall protection class—what you’ll learn, what mistakes everyone makes, and why this training might literally save your life one day.
Here’s Exactly What You’ll Be Doing
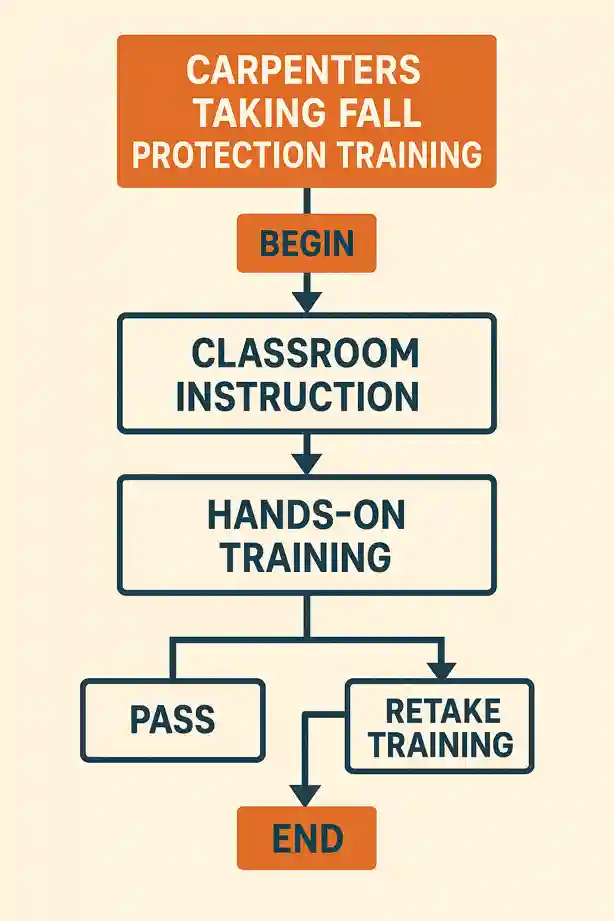
The Classroom Part: Surprisingly Not Boring
Let’s be real—nobody wakes up excited to watch safety videos. But fall protection class tends to be more interesting because they show things you genuinely encounter as a carpenter:
You’ll cover topics like:
- Common fall hazards in carpentry (roof edges, openings, leading edges, framing floors)
- Ladder do’s and don’ts
- Scaffold basics (yes, carpenters use them more than people think)
- When fall protection is required
- Types of gear and how they work
- Anchor points: what’s acceptable and what’s absolutely not
📋 Training Topics for Carpenters
| Training Topic | Why It Matters for Carpenters | Key Points Covered in Training |
|---|---|---|
| Height Hazard Awareness | Carpenters work on framing, roofs, beams, and unfinished structures with exposed edges. | Identifying fall hazards, reading the jobsite, adjusting to changing structure conditions. |
| Ladder Safety | Carpenters use ladders more often than most trades for framing, trim, and overhead tasks. | Ladder selection, proper angle, climbing with tools, avoiding overreach, stable setup. |
| Scaffold Safety | Carpenters install windows, fascia, siding, and exterior trim using scaffolds. | Assembly basics, guardrails, planking, climbing safely, weight limits, keeping platforms clear. |
| Roofing & Framing Fall Protection | Framing and roofing are where most carpenter fall accidents happen. | Anchors, harness systems, safe sheathing, truss installation, walking plates/beams safely. |
| Personal Fall Arrest Systems (PFAS) | Carpenters frequently work at heights with no guardrails. | Harness inspection, proper fit, lanyards, SRLs, fall clearance calculations, swing fall prevention. |
| Hole & Opening Protection | Carpenters create stairwells, skylight cutouts, and floor openings—big fall risks. | Cover requirements, securing covers, marking openings, guardrail rules for openings. |
| Material Handling at Heights | Carpenters carry plywood, lumber, and tools on elevated work surfaces. | Balance with heavy materials, safe lifting at height, preventing slip/trip when carrying materials. |
| Unstable/Incomplete Structures | Carpenters are often first on structures that aren’t fully braced. | Recognizing structural instability, avoiding unsecured sheathing, temporary bracing needs. |
| Weather-Related Fall Hazards | Carpenters work outdoors in all conditions. | Slippery surfaces, wind hazards with sheet goods, ice/frost, heat exhaustion affecting balance. |
| Aerial Lift Safety | For interior and exterior carpentry tasks requiring elevation. | Scissor vs boom lift rules, harness use, moving lifts safely, overhead hazards. |
| Carpenter-Specific Rescue Procedures | Rescue needs match carpentry situations—roof, joist spaces, stairwells. | Self-rescue basics, assisted rescue, fall arrest system rescue planning. |
| Regulatory Requirements (OSHA/Local) | Carpenters must follow OSHA 1926 rules for fall protection. | 6-foot rule, ladder standards, guardrail rules, residential construction requirements, documentation. |
| Optional: Tool Tethering & Housekeeping | Preventing dropped tools and reducing trip hazards. | Tool lanyards, organizing work zones, clearing debris from elevated surfaces. |
The instructor will probably pause videos and point things out:
- “See that guy? Leg straps loose. If he falls, good luck explaining that to his wife.”
- “That anchor point? That’s a 2×4 nailed into a stud. Instant fail.”
You’ll laugh, but you’ll also realize you’ve seen people do the exact same thing on your jobsite.
Failures you’ll see in the classroom:
- Misused ladders tipping over
- People climbing with tools in their hands
- Harnesses worn backwards (yes, it happens weekly)
- Workers tied off to pipes that pop out when they fall
- Roofers walking backward off edges (this one sticks with you)
The result of these failures?
Hospital visits, broken bones, and in worst cases, fatalities.
Every instructor knows at least one person who didn’t go home.
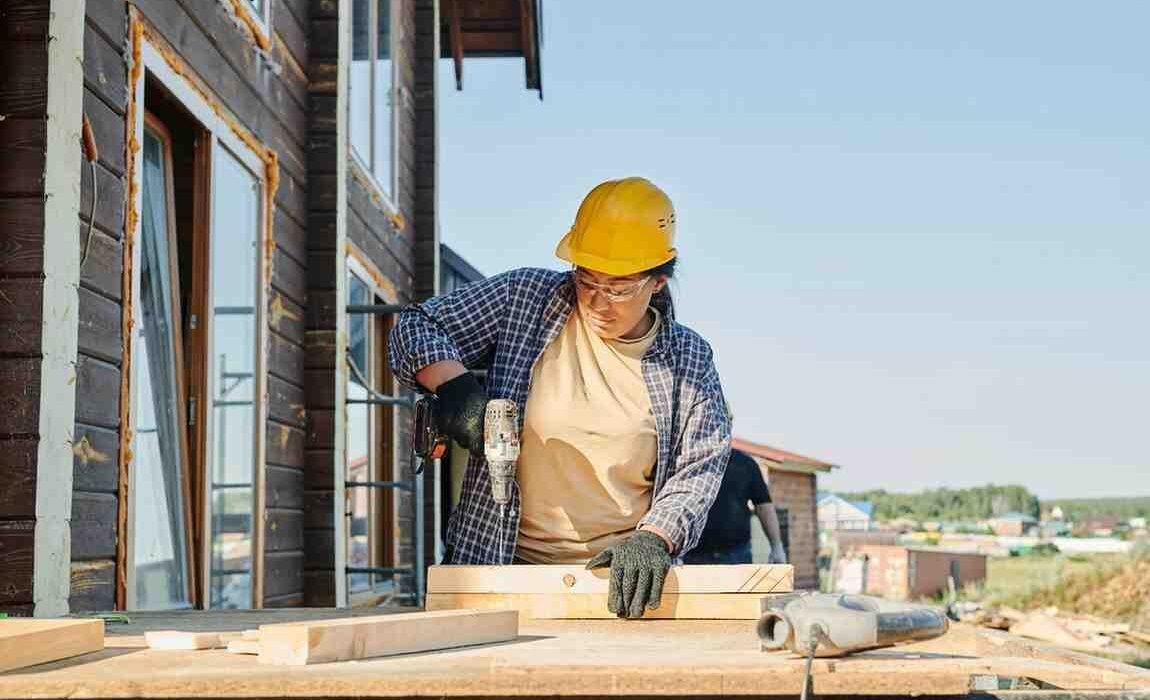
The Hands-On Portion: Everyone’s Favorite Part
This is where fall protection training actually becomes fun and practical.
You’ll learn how to:
- Inspect a harness like a pro
- Put it on properly (95% get corrected their first time)
- Adjust the straps so they fit snugly
- Check stitching, webbing, labels, and hardware
- Use a shock-absorbing lanyard
- Connect to proper anchor points
- Use SRLs (self-retracting lifelines)
- Understand fall clearance and swing fall
- Set temporary anchors on wood structures
- Position yourself safely when working on a roof or floor system
Here are exactly what will be taught in the hands-on portion:
| Activity | What You’ll Do | Why It Matters |
|---|---|---|
| Harness Donning & Adjustment | Put on a full-body harness, tighten straps, adjust chest, leg, and shoulder straps properly | Ensures the harness fits snugly and protects you during a fall |
| Inspecting Equipment | Check harness stitching, buckles, lanyards, SRLs, connectors, and labels | Carpenters use gear daily; knowing defects prevents equipment failure |
| Connecting to Anchor Points | Practice attaching lanyards/SRLs to approved anchors | Teaches correct and safe tie-off methods on wood frames and structures |
| Identifying Good vs Bad Anchor Points | Pick strong structural members and avoid weak or unsafe anchor options | Carpenters often work on new builds with temporary structures |
| Using Lanyards & SRLs | Learn how to move, reposition, and work while tied-off | Helps you maintain 100% tie-off while staying productive |
| Roof/Frame Edge Approach | Practice approaching edges or openings safely while tied-off | Common carpenter task—prevents falls during sheathing or framing |
| Ladder Safety Application | Climb, tie-off (if required), and maintain 3-point contact | Reinforces safe ladder practices during framing and installation |
| Scaffold & Temporary Platform Practice | Learn how to tie off (or when not required) on platforms | Helps carpenters navigate platforms safely during construction |
| Rescue Basics / Self-Rescue Awareness | Learn simple procedures for what to do after a fall | Ensures you aren’t hanging in a harness without a plan |
| Simulated Work Tasks | Perform tasks like measuring, nailing, installing joists while tied-off | Shows what real-life work feels like in fall protection gear |
You’ll probably see people make a few classic mistakes:
Common first-time mistakes:
- Harness on backward
Trust me, someone in your class will do this. - Leg straps way too loose
The instructor will pull the strap and say,
“If you fall, these will do more damage than the fall.” - Connecting to a weak anchor point
Someone will clip into a handrail or guardrail.
Instant fail. - Trying to wear the harness like a backpack
No. Just no.
But that’s the good thing—it’s better to make mistakes here than on a second-story deck.
Common First-Time Mistakes + Consequences
| Mistake | Why It Happens | Possible Result |
|---|---|---|
| Wearing harness backward | First-time nerves | Harness fails during fall |
| Loose leg straps | Not tightened enough | Severe body injury during arrest |
| Tying off to weak anchor | Assumes “anywhere” works | Anchor failure, full fall |
| Not inspecting gear | “Looks fine” attitude | Equipment fails when needed |
| Using damaged ladder | Habit or rushing | Ladder slips, fall from height |
| Carrying tools up ladder | Convenience | Loss of balance, backward fall |
The Process: What You’ll Actually Practice Step-by-Step
Let me break down the typical hands-on sequence in simple steps:
Step 1: Gear Inspection
- Check webbing for cuts, burns, or frays
- Check stitching for loose threads
- Find the label (no label = unusable)
- Inspect the metal hardware, buckles, and D-ring
Step 2: Putting on the Harness
- Slip it over your shoulders
- Adjust chest strap
- Tighten leg straps (you’ll get corrected here)
- Test movement: can you kneel, bend, reach?
Step 3: Anchor Points
- Identify real anchor points (rated 5,000 lbs or engineered)
- Learn what carpenters CANNOT anchor to (pipes, 2x4s, ladder rungs)
Step 4: Lanyards & SRLs
- When to use which
- How they absorb energy
- How to calculate fall clearance
Step 5: Simulated Tasks
- Climbing a ladder safely
- Connecting to an anchor on a roof mock-up
- Moving while staying tied off
- Practicing transitions
If the training center has a drop test demo, you’ll see how a 6-foot fall creates over 1,800 pounds of force.
That one visual changes how most people think forever.
Common Fall Protection Equipment Used by Carpenters
| Equipment | Purpose | When Carpenters Use It |
|---|---|---|
| Full-Body Harness | Fall arrest | Roof work, truss setting, framing |
| Shock-Absorbing Lanyard | Reduces fall impact | Lower-height work (6–12 ft drops) |
| SRL (Self-Retracting Lifeline) | Limits freefall distance | Roofing, ladders, leading edges |
| Roof Anchors | Tie-off point | Installing shingles, sheathing |
| Temporary Beam Anchors | Tie-off for structural framing | Walking plates, setting girders |
| Guardrails | Passive protection | Floor edges, openings |
The Test (Don’t Stress, It’s Not Hard)
Almost every fall protection class includes:
- A multiple-choice test
- A short practical demonstration
The written test covers:
- Identifying fall hazards
- When fall protection is required
- Proper anchoring
- Harness inspection steps
- Fall clearance basics
If you paid attention even a little, you’re fine.
For the hands-on part, you’ll usually be asked to:
- Inspect a harness
- Put it on properly
- Connect to a correct anchor point
- Explain why certain anchors are unacceptable
They’re not trying to fail you—they’re trying to make sure you don’t fail yourself on the job.
Real Failures & Their Results: What Instructors Often Tell You
Fall protection instructors love real stories. Not because they’re dramatic, but because they’re true.
Here are a few you’ll probably hear (and I’ve seen similar ones myself):
Failure: Worker tied off to a piece of scaffolding cross-brace.
Result: Cross-brace snapped. Worker fell 12 feet, fractured pelvis.
Failure: Carpenters walking the top plate without harnesses “just to mark layout.”
Result: One misstep, two broken ribs, concussion.
The crew never skipped harnesses again.
Failure: Ladder not tied off, worker carrying plywood up it.
Result: Ladder kicked out, worker fell backward, torn shoulder tendon.
Failure: Using a cheap harness with a missing label.
Result: Harness failed during a 4-foot fall test.
Good thing it failed in training and not on the job.
These stories hit differently when you realize you’ve done some of the same things.
After Class: What You Leave With
When you pass, you’ll typically get:
- A certificate
- A wallet card or digital ID
- Sometimes a sticker for your hard hat
- And—most importantly—a different mindset
The next time you walk onto a jobsite, you’ll notice things:
- “That anchor point is wrong.”
- “These joists need guardrails.”
- “Why is that guy climbing the ladder with a nail gun in his hand?”
Training sharpens your instincts.
And in this trade, good instincts keep you alive.
Why This Actually Makes You a Better Carpenter
Some carpenters think safety slows them down.
Let me tell you the truth:
Unsafe carpenters slow down the whole job.
When someone falls:
- Work stops
- Investigations happen
- The project gets delayed
- Everyone gets stricter oversight
- Morale drops
A trained carpenter:
- Moves more confidently
- Works smarter at heights
- Sets an example for the crew
- Protects apprentices from learning bad habits
- Helps keep the job moving
I’ve seen jobsite culture flip just because one guy decided to “do it right” consistently.
And sooner or later, people follow the example.
Final Thoughts: Your First Class Is Just the Start
Taking your first fall protection class as a carpenter isn’t about checking a box. It’s about walking onto the jobsite tomorrow with a mindset that might save your life.
Carpenters are some of the hardest working people in construction. But we’re also one of the trades exposed to the most fall hazards.
This class won’t turn you into a safety officer. But it will give you the knowledge and instincts to keep yourself safe while building the things others are scared to climb.
And trust me—after seeing enough accidents, you start to realize fall protection isn’t annoying.

Mike Pattenson is a construction safety trainer who loves helping workers stay safe on the job. He explains safety in a simple, practical way so crews can easily understand what to do — and why it matters.
Mike Pattenson is a construction safety trainer who loves helping workers stay safe on the job. He explains safety in a simple, practical way so crews can easily understand what to do — and why it matters.
View All Articles