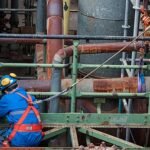
Let’s be honest: most people don’t think twice about where they clip their harness. I’ve seen workers snap onto anything that’s chest-high, convenient, or “looks strong enough.” Pipes, scaffolding rails, rebars, forklift masts—you name it, I’ve seen someone clip to it.
And every time, I cringe a little.
Because here’s the truth most folks don’t hear until something goes wrong:
Your harness can be the best one in the world, but if you clip it to the wrong place, it’s practically useless.
So today, let me walk you through—straight, simple, and from real experience—where your fall protection harness should be connected… and the places you should absolutely never hook into.
How To Decide Where to Connect Harness?
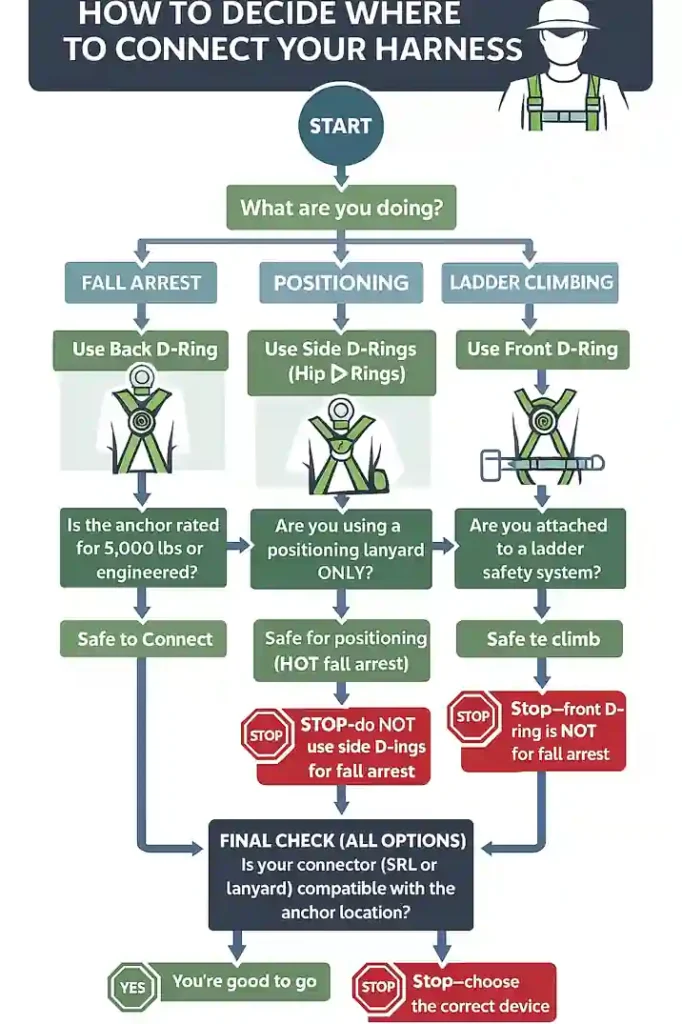
Where Should Fall Protection Harnesses Be Connected To
| Connection Point | Safe to Use? | When It Should Be Used | Notes / Tips |
|---|---|---|---|
| Back D-Ring (Dorsal D-Ring) | ✔ Yes | Fall arrest, SRLs, shock-absorbing lanyards | This is the main life-saving connection point. Always the default for fall protection. |
| Front D-Ring | ✔ Yes (Specific Uses Only) | Ladder climbing systems, controlled descent, restraint | Not for general fall arrest. Don’t attach a shock lanyard to this. |
| Side D-Rings (Hip D-Rings) | ✔ Yes (Positioning Only) | Work positioning, leaning back while working hands-free | Never use for fall arrest—will twist your body sideways in a fall. |
| Shoulder D-Rings | ✔ Yes (Rescue/Confined Space) | Vertical extraction, confined space rescue | Not for everyday tie-off or fall arrest. |
| Engineered Anchor Points | ✔ Yes | Any work requiring fall protection | Must be rated 5,000 lbs or approved by a qualified person. |
| Horizontal/Vertical Lifeline Systems | ✔ Yes | Roof work, long-span walking surfaces, tower work | Use with the correct connector (SRL or lanyard) based on the system’s design. |
| Roof Anchors (Permanent or Temporary) | ✔ Yes | Residential roofing, commercial roofing, maintenance work | Always check anchor rating and installation. |
| Mobile Fall Arrest Anchors | ✔ Yes | Steel beams, large equipment, open framing | Must be certified devices—not improvised anchors. |
The One Place Your Harness Was Designed to Be Connected To
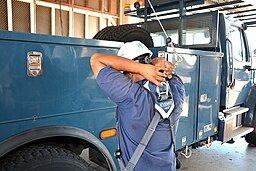
Let’s start with the big one: the back D-ring.
That rectangular metal ring between your shoulder blades—the one workers either ignore or complain about—that’s the primary fall arrest connection point. When a manufacturer designs a harness, they build everything around that D-ring. The stitching, the webbing, the straps, the load paths—it all leads to that one spot.
Why?
Because when you fall, the back D-ring does something incredibly important:
✔ It keeps you upright
When the lanyard catches you, the force pulls from behind, which naturally rotates your body into a feet-down position.
✔ It spreads the shock through the strongest parts of the harness
Your legs, waist, and chest all take part of the load so nothing gets overloaded.
✔ It prevents that horrible “face down” or “folded over” fall position
If you’ve ever seen someone fall while hooked to the wrong D-ring, you know exactly what I’m talking about. It’s like watching a puppet being yanked by the wrong string.
✔ It reduces the risk of flipping, twisting, or tumbling
A fall is messy. You can go sideways, backwards, half upside-down. The dorsal D-ring gives you the best chance of staying aligned when the fall arrest system catches you.
If fall protection is a seatbelt, the back D-ring is the buckle.
There really isn’t a substitute for it.
But Workers Still Hook Up to the Wrong D-Ring… Why?
There are a few reasons:
- The back D-ring is sometimes hard to reach
- It’s tempting to clip to whatever is in front of you
- Many workers don’t know the difference
- Some think, “I’ve been doing it this way for 10 years and nothing happened”
That last one is the most dangerous mindset on any jobsite.
Just because nothing has happened yet doesn’t mean the connection is safe. Safety isn’t based on luck—it’s based on physics, force, and the equipment actually being used the way it was designed.
I’d rather hear a worker say,
“I want to clip correctly so I never have to find out what happens if I don’t.”
D-Ring Types and Their Proper Use
| D-Ring Location | Purpose / When to Use | Not Allowed / Unsafe Uses |
|---|---|---|
| Back D-Ring (Dorsal) | Main fall arrest connection; keeps body upright during a fall. | Do not use for restraint or positioning-only tasks. |
| Front D-Ring | Ladder climbing systems, restraint. | Do not use for fall arrest with standard lanyards. |
| Side D-Rings (Hips) | Work positioning, leaning/tying off hands-free. | Never for fall arrest — body rotates sideways. |
| Chest D-Ring | Rescue, controlled descent, specialized ladder systems. | Not for standard fall arrest. |
Engineered Anchor Points
- Built and tested specifically to catch a falling worker — not just “strong-looking” metal.
- Usually welded or bolted into real structural steel or concrete.
- Often labeled or included in the site’s fall protection plan.
- If you want a no-guessing, no-drama tie-off point, this is the one.
Horizontal/Vertical Lifeline Systems
- Think of these as your safe “highway” to move while staying tied off.
- Horizontal lines let you walk long stretches without unclipping.
- Vertical lines are perfect for climbing ladders or towers safely.
- Always use the proper gear with them—like an SRL or rope grab made for that system.
Roof Anchors (Permanent or Temporary)
- These are anchors made specifically for roof work.
- Permanent ones stay installed; temporary ones go in just for the job.
- Must be screwed or bolted into the framing, not flimsy roof decking.
- When properly installed, they give you a solid, reliable tie-off right where you need it.
Mobile Fall Arrest Anchors
- These are your portable, bring-your-own tie-off solutions.
- Think beam clamps, trolley anchors, and weighted anchor systems.
- Perfect when the site doesn’t have built-in anchors.
- Just make sure it’s a certified device—not something improvised on the spot.
Safe vs. Unsafe Anchor Points
Not every spot on the jobsite is strong enough to save your life, even if it looks solid. I’ve seen workers clip to pipes, guardrails, and anything within arm’s reach—usually because it’s convenient, not because it’s safe.
The truth is, only a handful of anchor points are actually built to handle the force of a fall. Here’s a quick breakdown of what you can trust… and what you definitely shouldn’t even think about clipping to.
| Anchor Option | Safe? | Notes |
|---|---|---|
| Structural Steel Beam | ✔ Yes | Must be load-rated or approved. |
| Engineered Roof Anchor | ✔ Yes | Best for rooftop work. |
| Horizontal Lifeline System | ✔ Yes | Must be engineered. |
| Handrails | ✖ No | Not load-rated for fall arrest. |
| Pipes/Conduits | ✖ No | Can bend or snap instantly. |
| Scaffolding | ✖ No (unless rated) | Only OK if manufacturer says so. |
| Guardrails | ✖ No | Designed for horizontal, not vertical force. |
| Forklift Mast/Equipment | ✖ No | Moves unexpectedly; unsafe. |
| Rebar Cage | ✖ No | Not a certified anchor point. |
Anchor Point Strength Requirements
| Anchor Type | Strength Requirement | Notes |
|---|---|---|
| Fall Arrest Anchor | 5,000 lbs per worker | Or engineered to 2:1 safety factor. |
| Work Positioning Anchor | 3,000 lbs | Not for fall arrest. |
| Restraint Anchor | Must prevent reaching the edge | No free fall allowed. |
Situational Connection Guide (Where to Clip for Each Job Scenario)
Let’s be honest—half the confusion on the jobsite comes from not knowing where to clip in different situations. What’s right on a ladder isn’t right on a roof, and scaffolding has its own set of “don’t even think about it” rules.
I’ve watched workers hook up to the wrong spot simply because no one ever explained it in plain language. So here’s the easy version: a quick breakdown of common job scenarios and exactly where you should clip so you’re safe no matter what you’re doing.
| Work Scenario | Correct Connection Point | Wrong/Unsafe Connection Choices |
|---|---|---|
| Ladder Climbing | Front D-ring (with climbing system) | Back D-ring with a standard lanyard. |
| Roof Work | Back D-ring to roof anchor or SRL | Pipes, vents, guardrails. |
| Scaffolding | Back D-ring if there is an engineered tie-off point | Side rails, braces, or frames. |
| Warehouse/Aerial Lift | Anchor inside approved tie-off point | Forklift or scissor lift guardrails. |
| Rebar Work | Side D-rings for positioning + back D-ring for fall arrest | Clipping fall arrest lanyard to side D-rings. |
Correct vs. Incorrect Harness Setup Checklist
You’d be surprised how many workers wear a harness every day but still miss the little things that make a huge difference. A twisted strap here, a loose buckle there, or clipping to the wrong D-ring—these are the kind of mistakes that come back to bite you when it matters most.
This quick checklist breaks down the right way vs. the wrong way to gear up, so you can give yourself a fast reality check before stepping into any work-at-height situation.
| Checklist Item | Correct | Incorrect / Dangerous |
|---|---|---|
| D-Ring Used | Back D-ring for fall arrest | Side/front D-ring used incorrectly |
| Anchor Point | Rated 5,000 lbs or engineered | Pipes, handrails, equipment |
| Connector Type | SRL or shock lanyard | Positioning strap for fall arrest |
| Fall Clearance | Verified | Unknown / ignored |
| Harness Fit | Snug, no twists | Loose, straps twisted |
Where You Should NEVER Connect Your Harness
Let’s break down the no-go list. These are things that might look strong enough but absolutely aren’t.
| Unsafe Anchor Point | Why It’s Dangerous |
|---|---|
| Pipes / Conduits | They bend or snap instantly under fall arrest loads. |
| Handrails / Guardrails | Not designed to take vertical shock forces; they can collapse. |
| Scaffolding Rails & Braces | Most aren’t rated for fall arrest unless specifically engineered. |
| Rebar Cages | Not load-rated and can shift or fail during a fall. |
| HVAC Units / Rooftop Equipment | Not structural; they tear away from mounts easily. |
| Forklift or Telehandler Masts | They move, tilt, or bounce—zero stability during a fall. |
| Vehicle Racks / Pickup Truck Rails | Not engineered for fall arrest; can deform or detach. |
| Light Poles or Posts | Thin, flexible, and not designed to handle shock loads. |
| Loose or Unsecured Anchors | Anything that isn’t tested/certified can detach during a fall. |
| Random Hooks, Angles, or Protrusions | “Convenient” doesn’t mean safe; almost always unrated. |
❌ Pipes
❌ Conduits
❌ Scaffolding rails (unless rated for fall arrest)
❌ Guardrails
❌ Rebar cages
❌ HVAC units
❌ Roof racking
❌ Forklifts or equipment masts
❌ Light posts
❌ Railings
❌ Random hooks or protrusions
❌ ANYTHING not tested or rated
Just because other workers do it doesn’t mean it’s safe.
Bad habits spread faster than good ones on a jobsite.
The Two Questions That Tell You Instantly If You’re Clipped Correctly
If you want the quickest self-check ever, ask yourself:
1. Am I hooked to the BACK D-ring?
If the answer is no, go fix it.
2. Is the thing I’m clipped to rated for fall arrest?
If you hesitated for even one second, the answer is probably no.
Real Talk: “I’ve Been Doing It This Way for Years”
Every jobsite has that one worker who says:
“I’ve been tying off like this forever and nothing ever happened.”
And here’s what I tell them:
That just means you’ve been lucky, not safe.
Fall protection isn’t about how things went yesterday.
It’s about how things will go the one time something goes wrong.
Final Thoughts from Someone Who’s Seen Too Much Go Wrong
If there’s one message I’d want every worker to remember, it’s this:
Your harness only works if you clip it in the right place.
You can wear it perfectly.
You can secure all the straps.
You can do everything right.
But if you hook to the wrong spot, the whole system fails.
Take the five extra seconds to clip to the right D-ring and the right anchor.
Those five seconds might be the difference between walking away and being carried away.
Mike Pattenson is a construction safety trainer who loves helping workers stay safe on the job. He explains safety in a simple, practical way so crews can easily understand what to do — and why it matters.
Mike Pattenson is a construction safety trainer who loves helping workers stay safe on the job. He explains safety in a simple, practical way so crews can easily understand what to do — and why it matters.
View All Articles